To More Inquiry


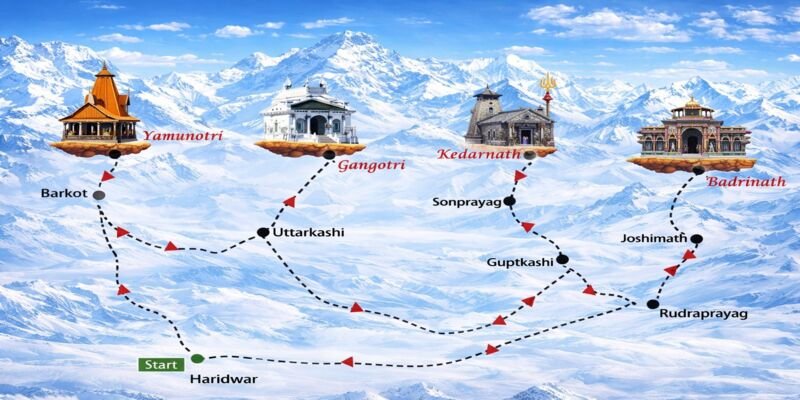
Understanding the Char Dham Yatra route map is essential for visualizing how the four sacred shrines of Uttarakhand are connected across challenging Himalayan terrain. The route map explains the natural flow of the pilgrimage, the reason behind its traditional order, and how geography, altitude, and river systems shape the journey. Rather than showing a direct path, the map reveals a carefully structured circuit developed over centuries.
The Char Dham Yatra connects Yamunotri, Gangotri, Kedarnath, and Badrinath, all located in the Garhwal Himalayas. The route map reflects a pilgrimage designed around mountain valleys and river corridors rather than straight-line distances. Each shrine is positioned at the end of a valley, which directly influences travel direction and daily movement.
The route map highlights gateway towns, base locations, road limits, and trekking sections. It also provides a clear sense of altitude progression, helping pilgrims understand how the journey gradually moves from lower elevations to high-altitude regions.
The Char Dham Yatra follows a traditional clockwise order that is both spiritually significant and geographically practical.
The traditional sequence shown on the route map begins with Yamunotri, followed by Gangotri, then Kedarnath, and finally Badrinath. This west-to-east movement before heading north allows pilgrims to adapt gradually to increasing altitude and terrain difficulty.
The clockwise flow aligns with Hindu ritual practice and follows the upstream course of sacred rivers. The route map clearly reflects this logic, showing a natural progression rather than abrupt directional shifts.
Most Char Dham Yatra route maps begin at Haridwar or Rishikesh, which act as entry points into the Himalayan region.
These towns are positioned at the foothills and provide essential infrastructure such as accommodation, medical facilities, and registration support. The route map shows the journey gradually ascending from these locations, allowing a smooth transition from the plains to the mountains.
Some route maps also indicate Dehradun as an alternative starting point, particularly because of its proximity to Yamunotri. This option is often highlighted for route flexibility rather than tradition.

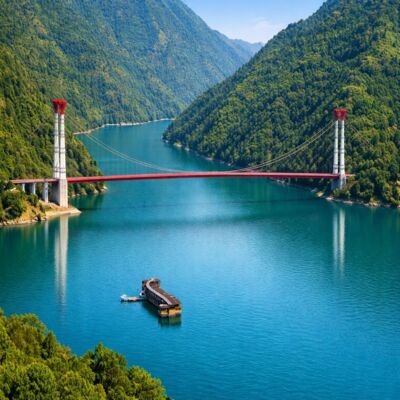
The Char Dham Yatra route is shaped entirely by Himalayan geography, which is clearly visible on the route map.
Each shrine lies along a major river system. Roads and trekking paths follow these rivers upstream because mountain ridges make direct cross-valley travel impractical. The route map visually reinforces this valley-based movement, explaining why travel often involves returning along the same path.
The repeated loops visible on the route map exist because shrines are located deep within enclosed valleys. Pilgrims must enter and exit along the same corridor, ensuring access to infrastructure and safer travel conditions.
Yamunotri appears as the westernmost point on the Char Dham Yatra route map.
The route map shows road access up to Janki Chatti, followed by a trekking route to the temple. This placement reflects Yamunotri’s remote location and its role as the natural starting point of the pilgrimage.
Beginning the yatra here allows pilgrims to encounter trekking early while energy levels are high and altitude is still manageable.
After Yamunotri, the route map shifts eastward toward Gangotri, marking the second phase of the yatra.
Gangotri is located further east and at a higher altitude than Yamunotri. Unlike Yamunotri, it is directly accessible by road, which the route map clearly indicates. This transition represents a gradual increase in both elevation and travel complexity.
Altitude planning is a critical feature of the Char Dham Yatra route map.
The journey begins at low altitudes near Haridwar and steadily rises through each dham. This structured ascent reduces physical strain and helps pilgrims adjust naturally before reaching the highest points of the yatra.
Although the shrines appear close on a map, the actual travel route is much longer.
The route map reflects winding mountain roads, steep gradients, and weather-sensitive zones. Direct routes are not possible due to the natural layout of the Himalayas, making valley-based travel the safest option.
Beyond logistics, the Char Dham Yatra route map carries symbolic meaning.
By following sacred rivers upstream and moving clockwise through the Himalayas, the route represents a gradual spiritual ascent. The increasing effort required at each stage mirrors the deeper spiritual commitment of the pilgrimage.
The first half of the Char Dham Yatra route map covers the journey from the foothill towns to the shrines of Yamunotri and Gangotri. This section introduces pilgrims to Himalayan travel conditions and sets the rhythm for the rest of the pilgrimage. The route is designed to allow gradual altitude gain while following well-defined river valleys.
From Haridwar or Rishikesh, the route map shows the journey moving toward the western Garhwal region. The road climbs steadily through forested hills and mountain towns before entering the Yamuna valley. Barkot is marked as the primary base town for Yamunotri and appears prominently on the route map due to its altitude and facilities.
Barkot functions as an acclimatization point where pilgrims prepare for their first shrine visit. Its position on the route map reflects a natural pause before entering more remote terrain.
Yamunotri is shown on the route map as partially inaccessible by road. From Barkot, the road continues to Janki Chatti, which is marked as the last motorable point. Beyond this, the route transitions into a trekking path.
The route map highlights a trek of approximately six kilometers from Janki Chatti to Yamunotri. This trekking path follows the Yamuna river upstream and gradually ascends through forested slopes. The temple’s placement at the end of this route reflects its secluded setting and spiritual significance.
After darshan, the route map shows a return journey along the same trekking and road path back to Barkot. This return loop is necessary due to the enclosed nature of the valley.
Once Yamunotri is completed, the route map directs pilgrims eastward toward Uttarkashi. This shift marks a transition from the Yamuna valley to the Bhagirathi valley. The road descends briefly before rising again, reflecting the natural undulations of Himalayan terrain.
Uttarkashi is shown as a major node on the Char Dham Yatra route map. Its location makes it an ideal base for Gangotri due to reliable connectivity, altitude suitability, and availability of essential services. The route map often emphasizes Uttarkashi as a recommended rest point before proceeding further.
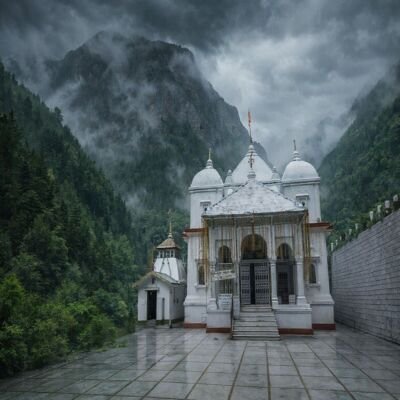
From Uttarkashi, the route map traces a clear path toward Gangotri along the Bhagirathi river. This section involves a noticeable altitude increase and narrower mountain roads. Unlike Yamunotri, Gangotri is directly accessible by road, which is clearly indicated on the map.
Gangotri appears near the upper end of the Bhagirathi valley, marking the easternmost stage of the yatra’s first phase. After darshan, the route map shows a return to Uttarkashi along the same road.
The route map reveals a consistent pattern for Yamunotri and Gangotri: entry into a river valley, travel to the shrine, and return to a base town. This structure allows controlled travel distances and access to support facilities.
By the time Gangotri darshan is completed, pilgrims have experienced both trekking and high-altitude road travel. This gradual exposure prepares them physically and mentally for the more demanding Kedarnath and Badrinath segments shown in the second half of the route map.
The final section of the Char Dham Yatra route map covers the journey from Gangotri to Kedarnath and onward to Badrinath. This phase represents the most demanding yet spiritually profound part of the pilgrimage, as the route reaches higher altitudes and enters more remote Himalayan terrain. The route map reflects careful planning to balance physical effort, safety, and spiritual tradition.
After completing darshan at Gangotri, the route map shows a return journey to Uttarkashi, followed by a southward movement toward the Mandakini river valley. This transition involves passing through important junction towns, with the route gradually shifting from the Bhagirathi river system to the Alaknanda and Mandakini rivers.
Rudraprayag appears as a key turning point on the route map. Located at the confluence of the Alaknanda and Mandakini rivers, it marks the gateway to the Kedarnath region. From here, the route continues uphill toward Guptkashi, which is identified as the primary base town for Kedarnath.
Guptkashi is prominently marked on the route map due to its strategic location and altitude. It serves as a preparation point before entering the Kedarnath sector and provides access to accommodations and essential services.
From Guptkashi, the route map follows the Mandakini river toward Sonprayag. This stretch shows a steady ascent and leads to Gaurikund, the last motorable point and the official base for the Kedarnath trek.
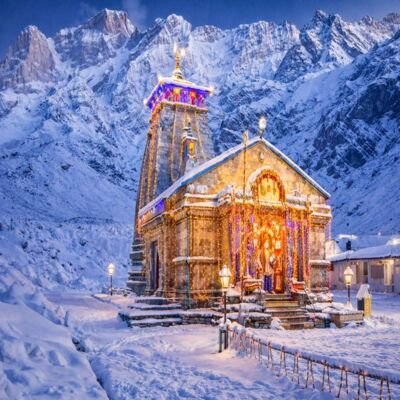
The route map highlights the trekking corridor from Gaurikund to Kedarnath as one of the most significant segments of the yatra. This trek follows the Mandakini river upstream and gradually climbs through rugged mountain terrain.
Kedarnath temple is shown at the end of this trekking route, situated in a high-altitude basin surrounded by steep peaks. Its placement on the route map emphasizes both its isolation and its importance within the Char Dham circuit.
After darshan, the route map indicates a return trek along the same path back to Gaurikund, followed by road travel to Guptkashi or nearby base towns.
Once the Kedarnath segment is completed, the route map directs pilgrims back through Rudraprayag and into the Alaknanda river valley. This transition represents a shift from trek-dominated travel to road-based movement.
The route passes through several confluence towns, which are traditionally significant and strategically positioned for rest. These towns appear on the route map as intermediate halts rather than final destinations.
Joshimath is marked as the principal base town for Badrinath on the Char Dham Yatra route map. Its location along the Alaknanda river and its relatively stable road connectivity make it a key stop before the final shrine.
From Joshimath, the route map shows a shorter ascent toward Badrinath, reflecting improved road access compared to the Kedarnath approach.
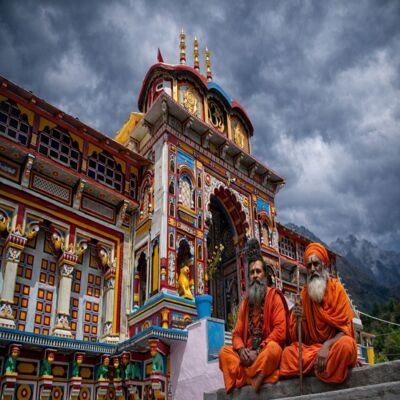
The final stretch to Badrinath follows the Alaknanda river closely. The route map depicts a scenic yet manageable drive, with fewer physical challenges than earlier segments.
Badrinath temple appears at the northernmost point of the Char Dham route map. Its road accessibility distinguishes it from Yamunotri and Kedarnath and makes it the natural concluding point of the pilgrimage.
With darshan at Badrinath, the Char Dham Yatra reaches its spiritual conclusion. The route map then shows return paths leading back toward Joshimath and onward to Haridwar or Rishikesh, completing the pilgrimage loop.
Viewed in its entirety, the Char Dham Yatra route map reveals a journey shaped by geography, river systems, and spiritual tradition. Each segment builds upon the previous one, creating a pilgrimage that is physically structured and symbolically meaningful.